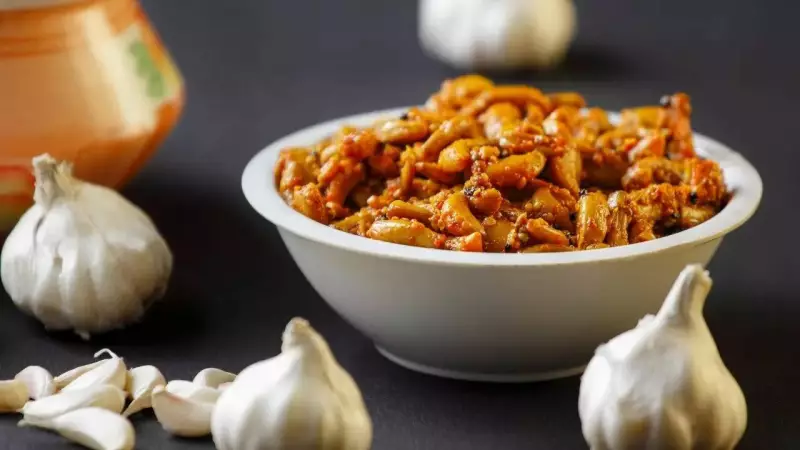
Garlic Pickle: A Beloved Indian Condiment
Garlic pickle, known as garlic aachar across India, stands as a cherished condiment. It captivates taste buds with its bold, pungent, sour, and spicy profile. This pickle holds a special place in Indian households. People regularly enjoy it alongside various dishes like dal, parathas, rice, and khichdi.
Beyond its delightful taste, garlic pickle offers digestive benefits. It harnesses the natural advantages of garlic. Following a proper guide allows you to craft this pickle in your own kitchen. Using fresh components without preservatives ensures the best flavor. The garlic essence shines through beautifully. This detailed guide walks you through the entire process.
Why Garlic Pickle Earns Its Popularity
Garlic features prominently in Indian cooking for both its aroma and health properties. It contains compounds like allicin, which may support heart health. Pickling garlic not only preserves it but also amplifies its flavor. This versatility lets you pair it with almost any meal.

Homemade garlic pickle made with mustard oil delivers unmatched taste. It combines tangy and pungent notes in a way store-bought versions cannot replicate. Plus, it stays free from artificial preservatives, offering a pure, wholesome experience.
Essential Ingredients for Garlic Pickle
A successful garlic pickle depends on the right blend of garlic, oil, and spices. Here is what you need:
- 1 cup garlic cloves (peeled): Fresh garlic ensures proper crunch and flavor.
- ½ cup mustard oil: Adds distinctive pungency and acts as a natural preservative.
- 2 tablespoons red chilli powder: Provides heat and vibrant color. Adjust to your preference.
- 1 tablespoon turmeric powder: Contributes an earthy aroma and aids preservation.
- 2 tablespoons mustard seeds (coarsely crushed): Imparts a nutty, peppery undertone.
- 1 tablespoon fennel seeds: Offers subtle sweetness to balance the chillies' heat.
- Salt to taste: Enhances flavor and helps preserve the pickle.
- 2 tablespoons lemon juice or vinegar: Introduces tanginess and serves as a natural preservative.
Each ingredient plays a vital role. Spices boost flavor, mustard oil extends shelf life, and lemon juice or vinegar balances taste while preserving the garlic.
Step-by-Step Guide to Making Garlic Pickle
Step 1: Clean and Dry the Garlic
Begin by preparing the garlic. Remove all peels carefully, ensuring no skin remains. Wash the peeled cloves thoroughly under running water to eliminate any dirt. Then, spread them on a clean, dry cloth. Let them dry completely. Moisture can spoil pickles, so this step is crucial.
Step 2: Heat and Cool the Mustard Oil
Mustard oil is key for traditional Indian pickle. Heat the oil until it reaches its smoking point. Turn off the flame and allow the oil to cool fully. Heating removes the raw, pungent edge and releases a pleasant aroma. Using oil at room temperature prevents cooking the garlic, maintaining its desired texture.
Step 3: Prepare the Spice Mix
In a separate clean bowl, combine red chilli powder, turmeric powder, crushed mustard seeds, fennel seeds, and salt. Mix them well to create a balanced blend. Keep the mix slightly coarse, not fine. This helps the spices adhere to the garlic, slowly releasing flavor with each bite.
Step 4: Coat the Garlic with Spices
Add the dried garlic cloves to the spice mixture. Gently toss them to coat each clove evenly. This step allows the garlic to absorb flavors over time. Avoid mashing the cloves; keeping them whole lets flavors penetrate effectively.
Step 5: Add the Mustard Oil
Slowly pour the cooled mustard oil over the garlic and spice mixture. Stir well to coat the cloves uniformly. The oil helps blend the spices with the garlic and acts as a preservative by inhibiting bacteria. It also maintains the cloves' crunchiness as flavors develop.
Step 6: Add Lemon Juice or Vinegar

Introduce lemon juice or vinegar for sourness and enhanced preservation. This balances the pungency of chilli and mustard oil. Mix everything thoroughly so all cloves contact the mixture, allowing flavors to meld. This step also slows spoilage, extending the pickle's shelf life.
Step 7: Store and Sun-Cure
Transfer the pickle to a clean, dry glass jar with a tight lid. Place it in sunlight for 3 to 4 days, shaking gently daily. Sun-curing helps the garlic absorb spices and oil properly. The warmth enriches the taste. Within a week, your garlic pickle will be ready to enjoy.
Storage and Serving Suggestions
- Always use a dry spoon to serve the pickle. This prevents moisture from causing spoilage.
- Store the pickle in a cool, dry place. Refrigeration can further prolong its shelf life.
- Garlic pickle improves with age. Be patient for the full depth of flavor to develop.
- Pair it with dal, rice, paratha, or khichdi for an authentic Indian meal experience.
Homemade garlic pickle lacks artificial preservatives. You can customize its spice level to suit your taste. By following these steps carefully, you create a fresh, tangy, and flavorful pickle that elevates any dish.