Kelp stands as one of the most underutilized and valuable resources in the vast world of Minecraft, particularly in the Bedrock Edition. Constructing an automated farm for kelp represents a highly beneficial investment for players seeking efficiency and sustainability. When smelted into dried kelp blocks, kelp serves as an exceptional renewable fuel source, with each block capable of smelting up to 20 items, making it a cornerstone for resource management in this sandbox game.
Why Build an Automated Kelp Farm?
Beyond its utility as fuel, kelp offers versatility through composting, which generates bone meal—a crucial item for accelerating plant growth and farming operations. This dual functionality enhances its appeal, positioning kelp as a multipurpose asset in any player's inventory. The automated farm not only streamlines kelp production but also minimizes manual labor, allowing for continuous harvesting and collection.
Essential Resources for Construction
Before embarking on the building process, gather the following materials: building blocks such as cobblestone or stone, 16 pistons, 16 observers, 16 redstone dust, 2 hoppers, 2 chests, 2 rails, 2 hopper minecarts, water buckets, and kelp. While optional, glass is recommended to provide visibility into the farm's internal operations during runtime.

Step-by-Step Guide to Building the Farm
Step 1: Construct the Base Platform
Begin by creating a platform measuring 10 blocks in length and 4 blocks in width. Place a row of 10 blocks on top of both long sides of this platform to establish the foundational structure for the farm.
Step 2: Install Pistons and Observers
Next, position eight pistons across the rows of blocks, ensuring they face inward toward the center of the platform. Add two building blocks on each side of the pistons, then place observers on top of each piston block. It is critical that the observers' faces also point inward, aligning with the direction of the pistons to detect kelp growth accurately.
Step 3: Integrate Redstone Components
Proceed by placing a row of blocks behind the pistons and covering the top of each block with redstone dust. Use additional building blocks to place a block on each side of the observer rows, followed by a row of blocks on top of the observers to secure the redstone circuitry.
Step 4: Develop the Collection System
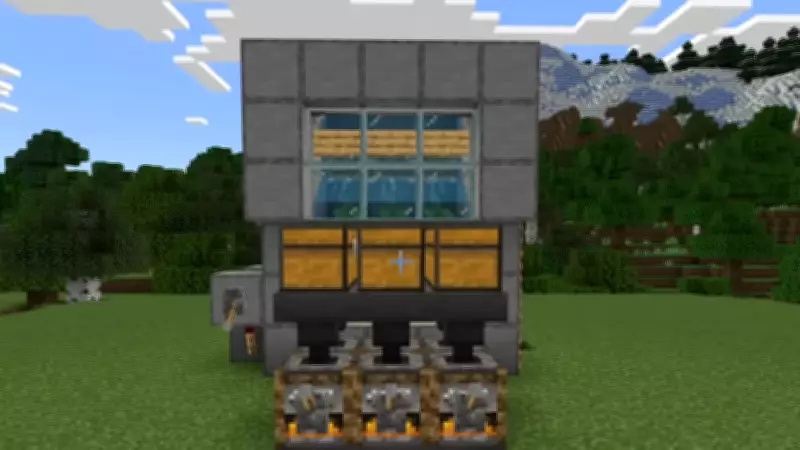
Now, focus on building the collection mechanism. Connect the two walls at the back using extra blocks. On the opposite side, arrange four glass blocks in a square formation. Place a double chest one block in front of and one block above the glass. Attach two hoppers to the chest behind it, then position two glass blocks on top of the chest and two building blocks on top of the hoppers. Install two rails on these blocks and add hopper minecarts on the rails. Finally, break the blocks supporting the rails so the minecarts fall and land on the hoppers, enabling automated item collection.
Step 5: Add Water and Plant Kelp
Complete the farm by filling the entire structure with water. Dive down to plant kelp across the floor of the build. As the kelp grows, it will trigger the observers, causing the pistons to break it automatically. The broken kelp will then float upward, where the hopper minecarts collect it and store it in the chest for easy access.
Conclusion
This comprehensive guide equips you with all the knowledge needed to build an efficient automated kelp farm in Minecraft Bedrock Edition. By following these steps, you can harness kelp as a renewable fuel source and bone meal generator, enhancing your gameplay with sustainable resource management.